Hosting a static website with GitLab and Cloudflare for free
I decided to strip down my hosting costs by getting rid of a personal virtual server that I managed the last ten years. One of the sites on this server is my personal website gremu.net. Since it is just generated from a static website generator, I figured I could deploy it for free somewhere using GitHub Pages or a similiar service.
I decided to go with the alternative GitLab. GitLab allows for as many private repositories as you want in their free plan and has an integrated CI system for free that you can use to deploy the site however you need.
TL/DR:
- Use a private repository on GitLab to host your source files
- Use GitLab's CI system to generate the static HTML using a static site generator of your choice
- Your GitLab page will be hosted on
https://<username>.gitlab.io, SSL secured - You can have a custom domain, by adding a
CNAMEentry, pointing to your GitLab page - Use Cloudflare to dramatically speed up your website, enforce HTTP
to HTTPS redirect and subdomain redirect like
http://www.gremu.net→https://gremu.net
Setting up GitLab Pages #
First thing we are going to try is to deploy your website to a GitLab Page.
I assume that you already have a static site generator setup, and that
you manage it using a git repository. You can choose from a large
variaty, I went with Pelican. However if
you don't have anything setup so far, just place a Hello World into a
index.html in the root of your git repository.
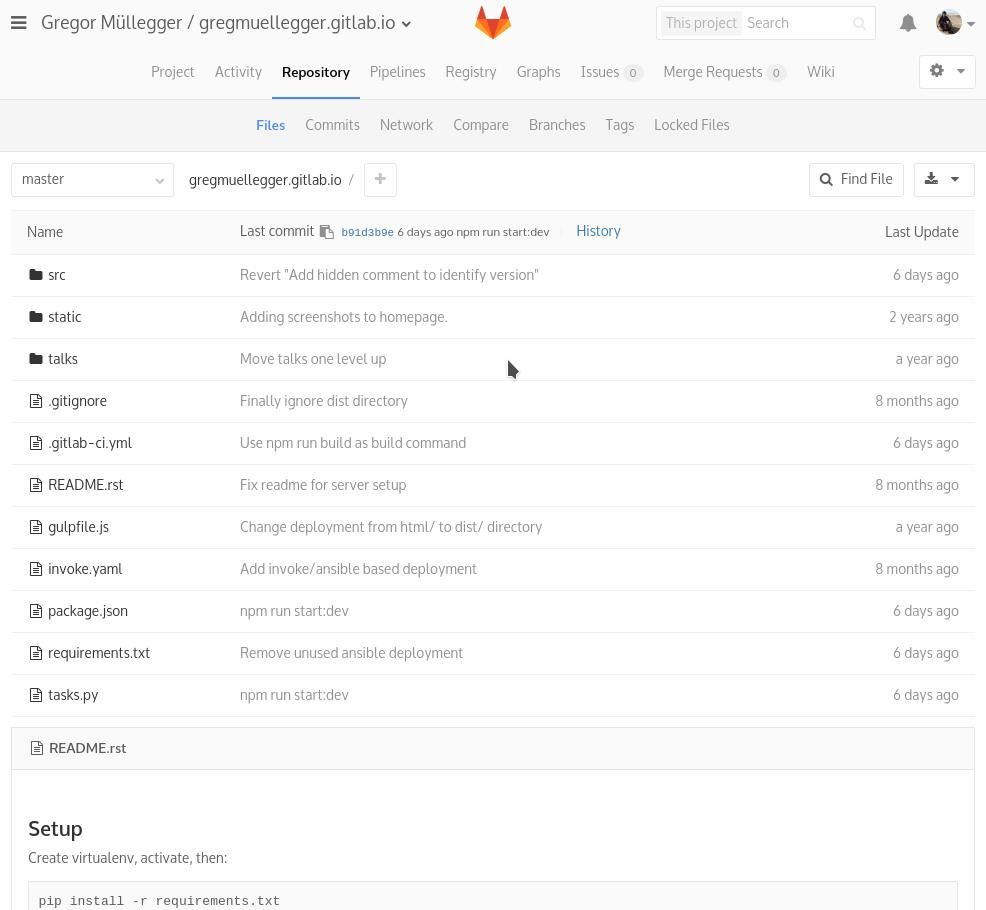
Register a free account on gitlab.com to get
started. Now you can create a private repository that will contain your
raw source files. The GitLab project should have the name
<username>.gitlab.io, so for example in my case it is named
gregmuellegger.gitlab.io. Now push the source files there and see how
the git repository is populated in GitLab. It will look very similiar to
any GitHub project that you have seen before:
Unlike with GitHub pages, the content of this repository will not be published automatically onto your website. GitLab allows you to use a build step that for instance can generate your HTML files from your Markdown files. The beauty of this is, that you do not need to check in the generated HTML files into your repository. And you don't have to remember generating and commiting them everytime you change something on the source files.
In order to use GitLab's CI system to generate the HTML files, you
create a .gitlab-ci.yml file in the root of your
repository. Mine looks something like this:
image: python:3.5

pages:
  script:
    - pip install "pelican==3.5.0"
    - pelican -o dist/ -s src/pelicanconf.py src/content
    - mv dist/ public/
  artifacts:
    paths:
      - public
  only:
    - master
This is a straightforward piece of configuration. Let's look at the
different parts. It starts with image: python:3.5, that defines the
base docker image we are using to build the site. The script part
let's you define a list of commands that are necessary to build your
site. The important part here is, that the built files need to end up
somehow in the public/ directory.
I do this by first executing my build step, i.e. the pelican command,
and then mv the generated files into the public/ directory.
The artifacts section is just here to point at the right location
where it should look for the created files. I have found that this
must be public/, otherwise it won't pick up the files for the
GitLab page. And last there is the only config. I choose to always let
the CI deploy my site when I commit something to master. You can for
example change the branch here if you want to have a designated release
branch. However be aware that if you leave out the only filtering, you
will end up deploying to your website with every commit, even if you
only worked in an experimental branch.
Here is an in-depth documentation on how to configure GitLab
pages in your
.gitlab-ci.yml file.
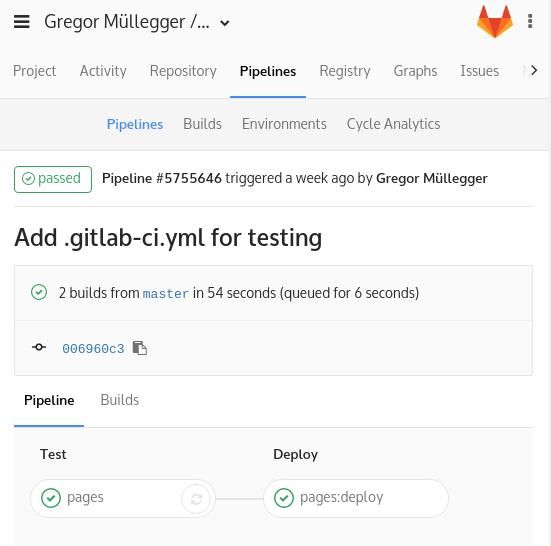
Congratulations! Once you push your .gitlab-ci.yml configuration to
the repository, the CI should kick in and do the rest. You can go to the
Pipelines section in your project, and see if the build goes green
or has some errors. If everything went as expected, the build will look
something like the screenshot below. You can now access your website
with the URL https://<username>.gitlab.io.
Using a custom domain with SSL encryption with GitLab pages #
Now we want to use our own custom domain, so we have a pretty URL in the
browser, in my case I want to configure https://gremu.net to point to
the GitLab page. So as a prerequisite, you need your domain already
ordered (which will probably not be free, but that's the only part of
your website that you need to pay for).
You could go now and configure your domain's CNAME entry to point to your GitLab page. However that has the drawback, that if you want to secure it with SSL, you would need to aquire your own certificate that you would then configure in your GitLab account. That could be done for free if you go with a service like Let's Encrypt, but it would require you to re-new the certificate manually every few months. As I'm too lazy for this I looked for other ways.
And as it turned out Cloudflare let's you do exactly that. The way it can do that is to configure your domain to use Cloudflare's DNS servers. Cloudflare as a CDN will then intercept all the traffic that goes to your domain and proxy your CNAME configuration.
So once the domain (let's say gremu.net) is set up correctly with
Cloudflare, and a CNAME is in configured Cloudflare's DNS settings to
point to GitLab pages (say gregmuellegger.gitlab.io), then the
following will happen when you access your site:
- You type
https://gremu.netinto your address bar. - Your browser will load an IP for this domain that points to a Cloudflare CDN server.
- The CDN server will look into it's configuration and make its own
request to
gregmuellegger.gitlab.ioin the background. - The CDN server will hand back the response it got from GitLab back to your browser.
So effectively Cloudflare is used as a proxy. That sounds weird in the first place, but gives us a few key parts which makes things easier:
- Cloudflare can now cache the responses from GitLab pages and make the page loads a lot faster (that's basically what every CDN does).
- Cloudflare provides a simple, but free SSL certificate out of the box for our domain. As the webtraffic goes to Cloudflare, they take the work of setting up the certificate. We don't need to renew anything.
- Cloudflare is an HTTP proxy, so we are more flexible with it than with what we could do with just a CNAME DNS entry. For example we can do redirects.
- You can configure a redirect from all
http://addresses tohttps:// - Cloudflare allows me to setup a redirect from
www.gremu.nettogremu.net, so no matter what domain you access, you will always end up onhttps://gremu.net
So getting all these points to work for you is the goal. Let's walk briefly to what you need to do to achieve this.
Setting up Cloudflare #
Of course you need to have an account with Cloudflare. Once you have set it up, you are prompted to configure your DNS nameservers to use the ones provided by Cloudflare.
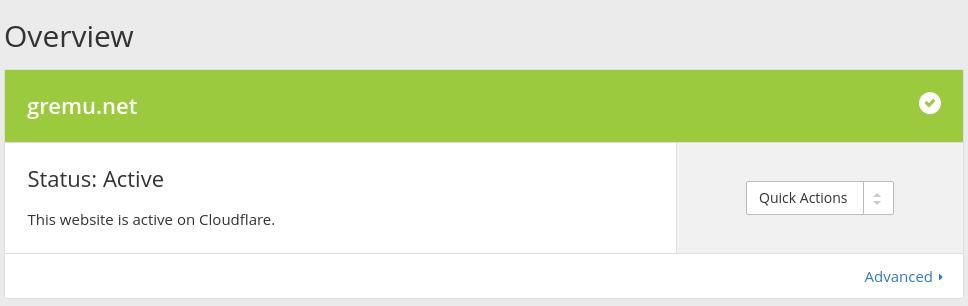
You need to do so in the admin panel of your Domain hoster. Depending on the usability of this admin panel, the option might be very deeply hidden inside some side menu unrelated to you domain configuration. Once you have found it, change the DNS servers to the Cloudflare ones. Now Cloudflare will show you the current status of the switch, this might take up to a few hours, but for me it was finished after about ten minutes.
Once this is completed the status on your domain overview page will switch to Active:
Cloudflare will by default keep your DNS settings that you have used
before on the previous DNS server, so the transition should be smooth if
you have the domain already in use. If not already done, you can now
configure a CNAME entry, so that the domain will point to the hosted
static website on GitLab.

Congratulations! You now have a static website hosted under your own domain.
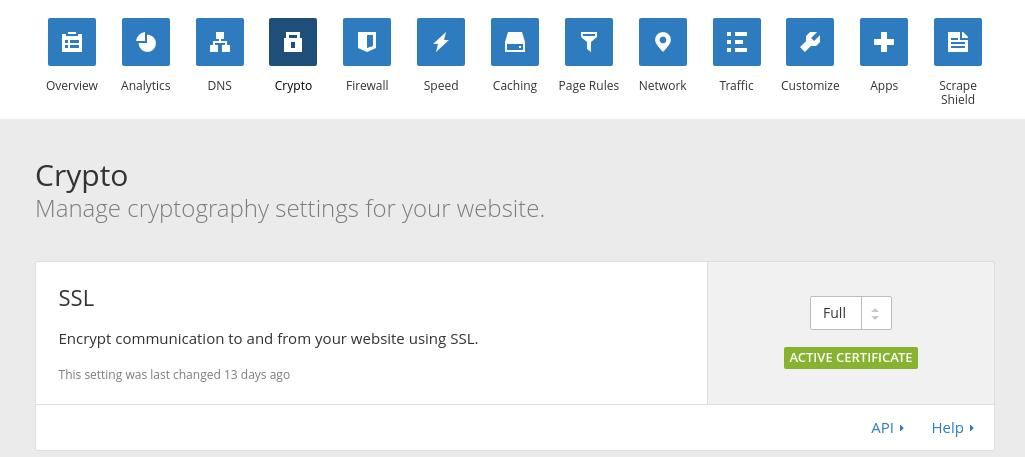
However for my choice this is not yet enough. I'm not happy without having set up SSL for the site. Even though it's static content and no one will want to enter a password on the site, it's good to put it behind SSL to mitigate man in the middle attacks that could inject malicious JavaScript into your site.
So let's activate SSL. The config is as simple as it can get. Just switch to the Crypto tab in Cloudflare and set the SSL setting to Full.
Voila! Everything encrypted. Like nearly everything. If a user accesses
the site directly by typing typing gremu.net, the browser will show a
non encrypted version. That is unfortunate as there would be an
encrypted equivalent available. This is now were Cloudflare gets really
useful. We can configure a redirect for this case.
You can configure redirects in the Page Rules tab in Cloudflare. For my project, I have setup two different redirects, they look like this:
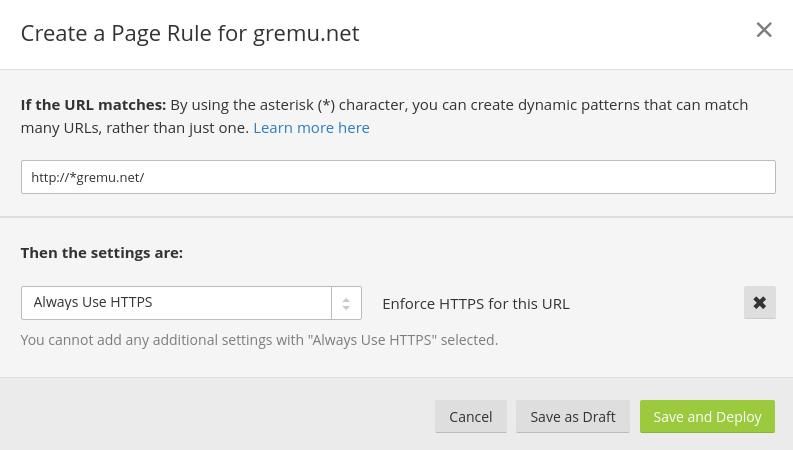
This one takes care of redirecting all the incoming HTTP requests to a secure HTTPS connection.
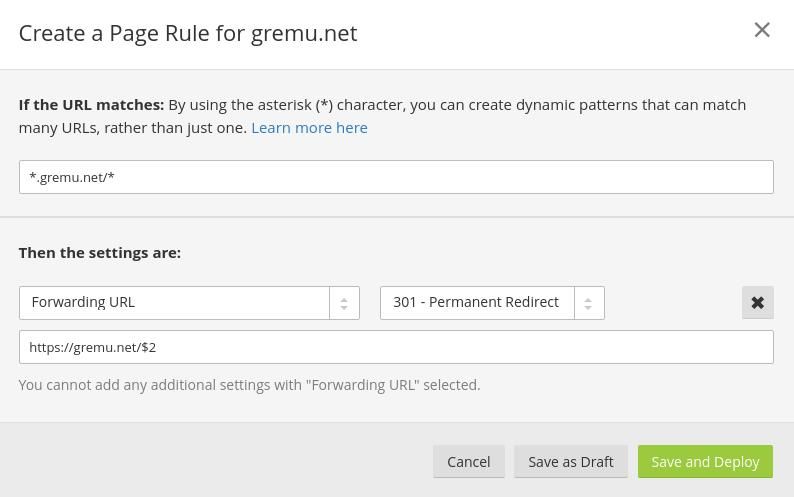
The second rule is useful since I want my site only t be displayed on
the root domain gremu.net. However I also want users be able to type
www.gremu.net directly into the browser bar, which this page rule will
take care of. Visitors arriving on www.gremu.net/page will be
automatically redirected to gremu.net/page.
Everything is ready to go #
After just a bit of configuration, everything is setup. I really enjoyed
the easy-ness of this setup and the no-brain involved here. I didn't
need to configure any HTTP server myself, no .htaccess rules were
necessary, everything works very cleanly out of the box and all I need
to do now to deploy something to my website is a simple git push.
Have you found another setup simpler? Any feedback on how I approached static website hosting in this post? Then get in touch.